Überspringen Sie zu Inhalten
Knowing how to install Glaswolle correctly is the critical barrier between a compliant, on-schedule project and one plagued by safety incidents and costly OSHA fines. On commercial job sites, mishandling glass wool insulation isn’t a minor inconvenience; it’s an operational risk that can lead to worker irritation, Projektverzögerungen, and increased labor costs. One poorly managed installation can compromise team safety and expose your entire operation to liability.
This B2B guide serves as a standard operating procedure for safe and effective glass wool installation. We will detail the entire workflow, from proper site preparation and material handling to the step-by-step installation process. You will also learn to identify common safety hazards and avoid the frequent installation mistakes that lead to failed inspections and compromised thermal performance.
Safe Glass Wool Installation for Commercial Projects Guide
Von 2026, the value of glass wool is realized not just from the material, but from strict adherence to installation protocols that guarantee both long-term performance and worker safety.
Successful commercial insulation projects depend on three core pillars: rigorous safety compliance, precision installation methods, and validated quality control. Getting any of these wrong undermines the material’s thermal performance and introduces unnecessary risk. This guide outlines the current industry standards for installing glass wool safely and effectively in commercial settings.
Adherence to Safety Protocols and PPE
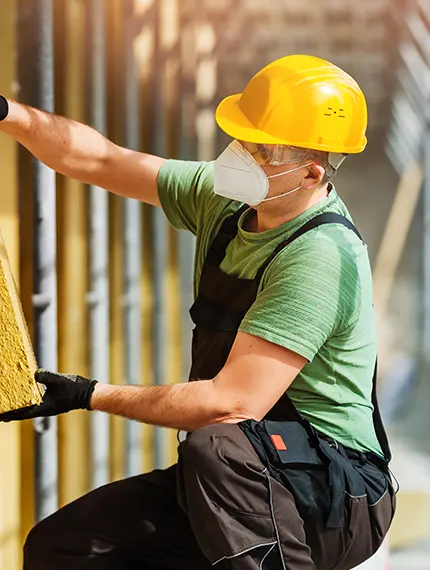
Commercial installation projects demand strict compliance with standardized safety protocols. The primary objective is to prevent health hazards associated with handling glass wool fibers by controlling the work environment and mandating the use of personal protective equipment (PSA). The risk of irritation is highest during cutting and fitting, when fibers are most likely to become airborne.
- Utilize appropriate PPE, including respiratory masks (N95 or equivalent), Schutzbrille, Handschuhe, and full-body coverings.
- Ensure the work area is well-ventilated to minimize airborne fiber concentration.
- Follow established procedures for material handling and site cleanup to maintain a safe environment.
Precision Installation Techniques
Proper installation technique directly impacts the insulation’s thermal performance and longevity. Industry best practices focus on methods that preserve the material’s structural integrity and R-value. Compressing the material, for example, reduces its ability to trap air and subsequently lowers its thermal resistance.
- Apply friction-fitting methods to secure insulation batts snugly within cavities without compressing the material.
- Maintain proper spacing around vents and electrical fixtures to ensure adequate airflow and prevent fire risks.
- Implement multi-layer configurations with staggered joints to eliminate thermal bridges and create a continuous insulation barrier.
Quality Assurance and Durability Standards
The commercial sector now expects glass wool insulation to meet high durability standards, with performance guarantees often extending up to 50 years when installed correctly. This shift emphasizes the importance of professional certification and strict adherence to manufacturer guidelines, as improper installation can void warranties and lead to premature failure.
- Verify that installation practices align with the manufacturer’s specifications to validate performance guarantees.
- Engage certified professional installers who are trained in current techniques and quality standards.
- Conduct post-installation inspections to confirm the insulation is correctly fitted and free of gaps or compression.
Site Preparation Before Installing Glass Wool Insulation
A successful glass wool installation hinges on meticulous site preparation, where structural safety, Feuchtigkeitskontrolle, and material validation are addressed before any insulation is unpacked.
Proper preparation prevents costly failures and ensures the insulation performs to its specified R-value for decades. Skipping these steps can lead to reduced thermal efficiency, moisture damage, and safety violations. The process is straightforward and breaks down into three key areas: assessment, environmental control, and material validation.
Safety and Structural Assessment
Before work begins, a comprehensive site assessment confirms the building’s structural integrity and addresses potential worker safety issues. This initial evaluation aligns the project with building codes and identifies hazards, creating a secure and compliant work environment from day one.
- Conduct a pre-work hazard identification to clear the installation area of risks.
- Equip all workers with the correct Personal Protective Equipment (PSA) and verify that ventilation meets job site safety standards.
- Confirm the structure complies with all relevant building codes before bringing materials on-site.
Moisture Control and Waterproofing
Moisture is the primary threat to glass wool’s thermal performance. Effective moisture management is not optional; it is essential for protecting the material and the building structure. All sources of potential water intrusion must be sealed, and the installation area must be completely dry before proceeding.
- Implement and enforce moisture management protocols to ensure the site remains dry during the entire installation.
- Inspect and seal any leaks, cracks, or gaps in the building envelope to prevent water entry.
- Verify all waterproofing measures are correctly installed and functional before introducing insulation.
Area Measurement and Material Inspection
Accurate measurements and a thorough material inspection prevent performance loss from compression and avoid delays caused by defective products. This step involves precisely mapping the installation area and checking all insulation materials for transport damage or manufacturing defects upon arrival.
- Use detailed measurement protocols to ensure insulation fits properly without compression, which significantly reduces its R-value.
- Systematically inspect all glass wool materials for damage, Feuchtigkeit, or defects before starting the installation.
- Identify any thermal bridges during the assessment and plan for their correct treatment.
Get Custom Glass Wool Insulation Solutions
Proper Handling and Storage of Glass Wool Materials
Maintaining the thermal performance of glass wool begins before installation; standardized on-site storage protocols that mitigate moisture, UV-Belastung, and physical damage are now a non-negotiable industry requirement.
The R-value and structural integrity of glass wool are determined not just by its manufacturing quality but by how it’s handled on-site. Exposure to environmental factors can degrade the material before it ever reaches the building envelope. Proper storage and handling are critical control points that directly impact project outcomes and long-term energy efficiency.
Environmental Controls for Material Integrity
Protecting glass wool from the elements is the first line of defense in quality control. Moisture is the primary threat, as water saturation collapses the air pockets that provide thermal resistance. UV radiation and extreme temperatures can also weaken the resin binders that give the insulation its form, making it less effective once installed.
- Store materials in a dry, covered area to prevent moisture absorption from rain or high humidity.
- Keep glass wool away from direct sunlight, as UV radiation can degrade packaging and binders over time.
- Maintain a stable temperature in the storage location to avoid compromising the material’s composition.
Correct On-Site Storage Practices
Industry standards for on-site storage focus on preserving the product in its factory condition until the moment of use. Keeping materials in their original, compressed packaging protects them from contamination and physical damage. Elevating the product off the ground is a simple but essential step to prevent moisture wicking from concrete slabs or soil.
- Keep glass wool in its original packaging until it is ready for use to protect it from dust and physical damage.
- Place all materials on pallets or elevated surfaces to avoid direct contact with ground moisture.
- Ensure the storage area is well-ventilated to help manage humidity and prevent condensation.
Inventory Management and Safety Protocols
Professional site management extends to systematic inventory control and safety compliance. A First-In, First-Out (FIFO) system ensures that material doesn’t sit degrading in storage for extended periods. Equally important is adherence to the manufacturer’s Safety Data Sheet (Sicherheitsdatenblatt), which provides specific guidelines for handling, personal protective equipment (PSA), und Notfallverfahren, reflecting a maturing professional standard across the construction sector.
- Apply a First-In, First-Out (FIFO) inventory system to use older stock first and maintain material freshness.
- Follow the handling guidelines specified in the manufacturer’s safety data sheets (Sicherheitsdatenblatt).
- Keep storage areas organized and clear of obstructions to allow for safe and efficient material handling.
Step-by-Step Glass Wool Installation Process
Successful glass wool installation hinges on precise cutting and the use of the friction-fit method, which eliminates thermal bridging and reduces labor time by avoiding mechanical fasteners.
Measuring and Cutting Glass Wool to Fit
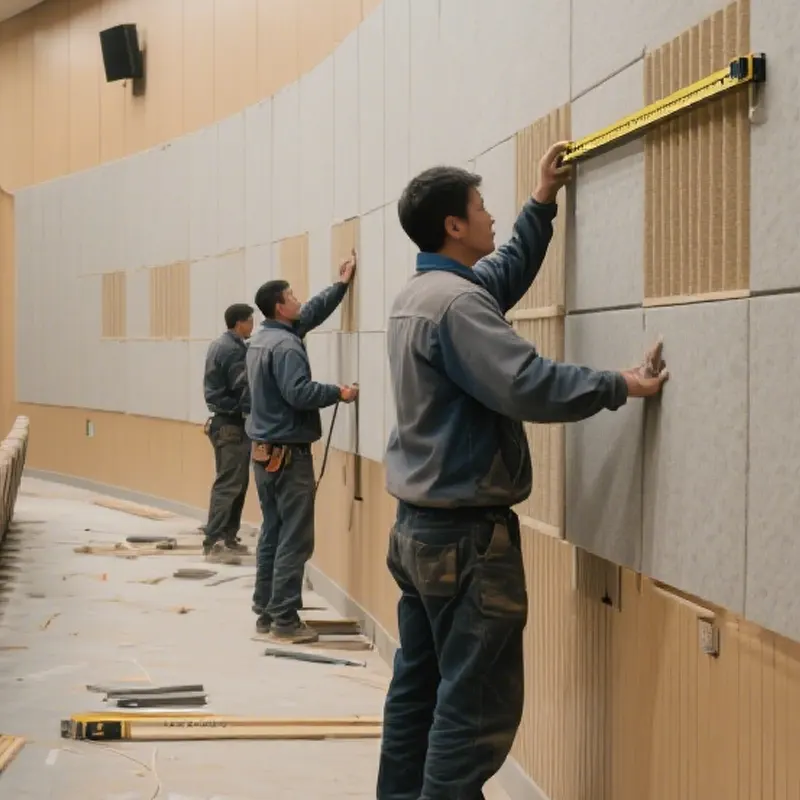
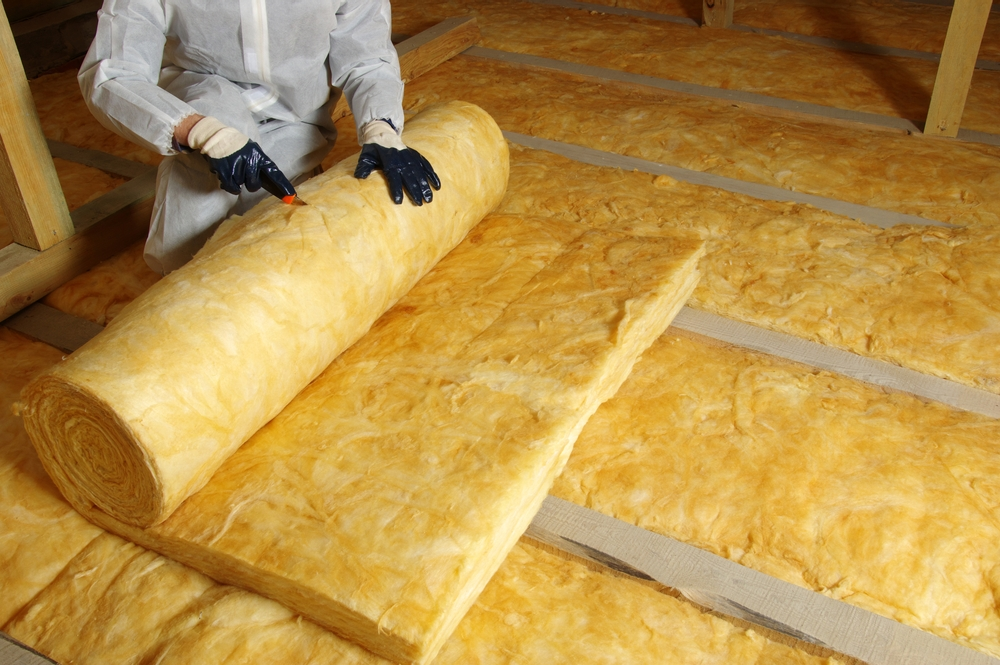
The installation process starts with accurate measurements to ensure a snug fit inside wall cavities or between joists. This tight fit is critical for achieving the specified thermal performance and preventing air leakage. Measure the width and height of the cavity between framing studs, and then cut the insulation batt slightly wider—typically about a half-inch—to create a compression fit that holds itself in place. Use a sharp utility knife and a straight edge to make clean cuts, which prevents tearing the fibers and ensures a tight seal against the framing.
| Parameter | Traditional Stapling Method (Legacy) | Modern Friction-Fit Method (RPPOWER® Standard) |
|---|---|---|
| Fastening Mechanism | Mechanical staples attached to framing studs. | Natural compression from cutting the batt slightly wider than the cavity. |
| Compression Risk | Hoch. Over-driving staples can compress the glass wool, reducing its R-value. | Niedrig. The method relies on the material’s natural elasticity to expand and fill the space. |
| Installation Speed | Slower due to the extra step of fastening and stapling each batt. | Faster, as installers simply cut and press the batts into place. |
| Wärmeleistung | Prone to gaps and thermal bridging around staples and poorly fitted sections. | Superior seal with full contact against studs, minimizing heat loss. |
Applying the Friction-Fit Method
The friction-fit technique is now the industry standard because it simplifies installation and improves performance. Instead of relying on staples, this method uses the glass wool’s own properties to hold it in position. Gently press the cut piece of insulation into the cavity, making sure it fits snugly against the top and bottom plates and the studs on each side. The key is to avoid compressing or overstuffing the batt. Compression reduces the air pockets within the fibers, which directly lowers the material’s thermal resistance (R-Wert) and undermines the purpose of the insulation.
Working Around Obstructions
Commercial projects always involve obstructions like electrical boxes, wiring, and plumbing. Handling these correctly is non-negotiable for maintaining a continuous thermal barrier and meeting safety codes. You need to cut the insulation to fit tightly around all sides of these objects without leaving gaps.
- Electrical Boxes: Cut notches in the batt to fit perfectly around the box. Do not simply press the insulation over it, as this creates a large void behind the box.
- Wiring: Carefully split the thickness of the insulation batt. Place one half behind the wire and the other half in front, allowing the wire to run through the middle of the insulation.
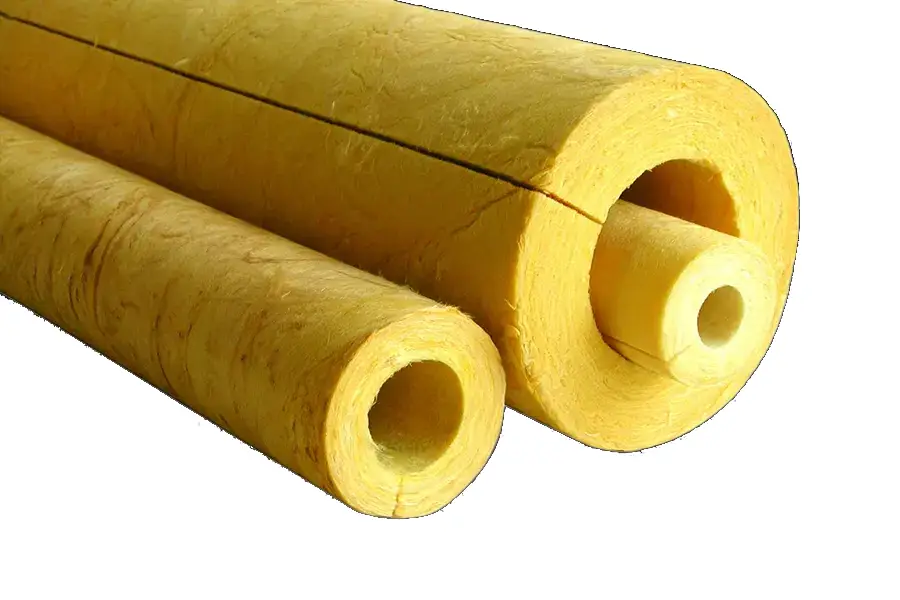
- Rohre: Cut the insulation to fit snugly around the pipe. For larger pipes, you may need to cut two custom pieces to fit around each side.
Verifying Clearances and Ventilation
The final step is to ensure compliance with building codes related to safety clearances and ventilation. This prevents fire hazards from heat-producing fixtures and stops moisture problems in enclosed spaces like attics. Always maintain the legally required clearance around recessed lighting, vents, and chimneys. Do not block soffit vents or any other attic ventilation pathways with insulation, as this can trap moisture and lead to rot or mold. Double-check that all electrical components are insulated around correctly without creating a direct fire risk.
Avoiding Common Safety Risks During Installation
The critical control point for glass wool safety is minimizing fiber exposure during installation by using correct personal protective equipment and specific work practices.
Safety during glass wool installation is not about the material itself but how it’s handled. Once installed and sealed behind walls, it poses no health risk. The focus is entirely on controlling airborne fibers during the active phases of cutting and fitting. Implementing a few standard protocols effectively eliminates any potential for skin irritation or respiratory issues.
Using Personal Protective Equipment (PSA)
Using appropriate PPE is the primary defense against direct contact and fiber inhalation. This equipment is non-negotiable during handling and cutting, as these activities generate the highest concentration of airborne particles. Proper gear prevents short-term skin irritation and keeps fibers out of the eyes and respiratory system.
- Wear N95-equivalent dust masks to prevent inhalation of airborne fibers.
- Use safety goggles to protect eyes from insulation particles.
- Cover exposed skin with long-sleeved clothing and gloves to avoid irritation.
| Activity / Risk Level | Required PPE | Key Rationale |
|---|---|---|
| Hoch: Schneiden, fitting, or removing insulation | N95 Mask, Goggles, Gloves, Long Sleeves | Maximizes protection when airborne fiber concentration is highest. |
| Medium: Site cleanup and waste handling | N95 Mask, Gloves | Prevents inhalation of settled dust and avoids skin contact with off-cuts. |
| None: Working near sealed, installed insulation | Standard workwear | Fibers are fully contained and no longer pose an exposure risk. |
Ensuring Proper Workspace Ventilation
Ventilation is a simple yet effective way to reduce the concentration of airborne fibers. Proper air circulation disperses particles quickly, creating a safer breathing environment for the installation team. It complements PPE by lowering the overall fiber load in the air.
- Work in well-ventilated spaces by opening windows and doors to create airflow.
- Use fans to direct airborne fibers away from the work area, especially during cutting.
- Consider using local exhaust ventilation systems for large-scale indoor projects.
Safe Handling and Cutting Techniques
How you handle and cut the material directly impacts fiber release. Clean, precise techniques generate fewer airborne particles than rough or improper methods. Mastering these simple procedures is a key control point for managing job site safety and air quality.
- Cut glass wool on a flat, stable surface with a sharp utility knife to ensure clean cuts and less fiber release.
- Avoid shaking or tearing insulation materials, as this can dislodge and aerosolize fibers.
- Clean the work area using a HEPA-filtered vacuum instead of dry sweeping to capture fibers without making them airborne.
Inspection and Quality Checks After Installation
Post-installation checks have evolved beyond simple visual reviews; modern quality assurance now combines physical assessments with thermal imaging and energy consumption analysis to verify real-world performance.
Visual Inspection for Physical Integrity
A thorough visual check is the first step in post-installation quality control. It confirms the insulation is free from physical defects that could compromise its performance. This initial pass helps identify common issues like tears from handling, unintentional compression that reduces R-value, or even signs of pest activity that can degrade the material over time.
- Look for signs of compression or sagging, which can create thermal gaps and reduce effectiveness.
- Identify any tears, punctures, or damage to the insulation material or its facing.
- Check for evidence of pests, as nesting can damage the insulation’s structure and create voids.
Assessing for Moisture Infiltration
Moisture is a primary cause of insulation failure because it drastically reduces thermal resistance. A proper inspection must focus on detecting any sign of water intrusion or condensation buildup within the insulated assembly. Wet insulation doesn’t just fail to insulate; it can also promote mold growth and structural decay.
- Inspect for water stains, discoloration, or dampness on the insulation surface and surrounding framing.
- Ensure vapor barriers are correctly installed and fully sealed at all seams and edges to prevent moisture from reaching the insulation.
- Verify that areas around pipes, vents, and other wall or ceiling penetrations are properly sealed against water entry.
Evaluating Thermal Performance
Visual checks confirm the material’s condition, but they don’t confirm its performance. Modern quality assurance uses tools like thermal imaging cameras to get precise data on heat loss and installation consistency. This allows for a data-driven evaluation of the system’s effectiveness, moving beyond guesswork to quantifiable results.
- Use thermal imaging to detect cold spots that indicate gaps, voids, or inadequate coverage.
- Analyze energy consumption trends after installation to verify expected efficiency improvements.
- Confirm that all seams and joints are tight and properly sealed to prevent air leakage and thermal bridging.
Common Installation Mistakes B2B Buyers Should Watch For
Most glass wool installation failures stem from three controllable errors: improper moisture management, compressing the material, and leaving unsealed gaps around fixtures.
Ignoring Moisture Control and Vapor Barrier Placement
A frequent and costly error is the improper placement of vapor barriers or exposing insulation to moisture before it’s sealed. When water gets trapped inside a wall cavity, it degrades the thermal performance of the glass wool and creates a significant risk of rot and structural damage to the building itself. This single oversight can undermine the entire insulation system.
- Placing a vapor barrier on the wrong side of the wall assembly for the local climate traps moisture instead of blocking it.
- Failing to properly seal all seams and edges of the barrier allows moisture to bypass it completely.
- Storing insulation materials in damp conditions on-site before installation saturates them with water, compromising their effectiveness from the start.
Compressing Insulation Material
Overstuffing insulation into cavities is a counterproductive practice that severely reduces its effectiveness. The material’s thermal resistance (R-Wert) depends on the tiny pockets of trapped air within the fibers. When the material is compressed, these air pockets are eliminated, and its ability to resist heat flow is crippled.
- Forcing oversized batts into smaller stud cavities instead of cutting them to the correct size is a common shortcut that degrades performance.
- Packing insulation too tightly around wiring, Rohre, or electrical boxes creates a weak point in the thermal envelope.
- This compression turns high-performance insulation into a less effective thermal barrier, directly leading to energy loss.
| Common Mistake | Technical Consequence | Best Practice (RPPOWER® Standard) |
|---|---|---|
| Compressing or overstuffing batts | Eliminates insulating air pockets, reducing R-value by up to 50% and creating a thermal bridge. | Precision cut to size and install via friction-fit method, allowing full loft to be maintained. |
| Incorrect vapor barrier placement | Traps moisture within the wall cavity, leading to mold, rot, and insulation degradation. | Install barrier on the warm-in-winter side of the assembly, specific to the local climate zone. |
| Leaving gaps around fixtures | Allows for air infiltration and convection, creating cold spots and significant cumulative energy loss. | Meticulously cut and fit insulation around all penetrations, ensuring no air gaps remain. |
Leaving Gaps Around Fixtures and Penetrations
Unsealed gaps around obstacles like outlets, Rohre, and windows create pathways for air to move through the insulation, known as thermal bridges. Even small gaps can collectively undermine a building’s energy efficiency, allowing conditioned air to escape and outside air to infiltrate.
- Not cutting insulation precisely to fit snugly around electrical outlets and plumbing fixtures is a primary cause.
- Leaving air pockets or unsealed joints between individual insulation batts or boards compromises the continuous thermal barrier.
- These small, often overlooked openings can lead to significant and preventable heat loss over the life of the building.
Skipping Pre-Installation Site Preparation
An effective insulation system relies on a clean, dry, and properly sealed surface. Bypassing essential site preparation can trap dirt, debris, or moisture behind the insulation, which compromises its long-term performance and the integrity of the building envelope.
- Installing insulation over damp or dirty surfaces can trap moisture and lead to performance degradation.
- Not sealing existing cracks or holes in the sheathing or foundation allows for continued air leakage, defeating the purpose of the new insulation.
- Proper preparation ensures the insulation can perform exactly as specified without being compromised by underlying site problems.
Abschluss
Proper glass wool installation is more than a checklist; it’s a critical factor in project safety and long-term performance. Following these steps protects your crew from common hazards and ensures the material delivers its full thermal and acoustic benefits. A safe, correct installation builds trust with your clients and prevents costly rework.
If you have an upcoming project requiring high-performance glass wool, our team can provide technical specifications and material samples. We specialize in creating custom insulation solutions that match your project’s budget and performance requirements.
Häufig gestellte Fragen
Can you touch glass wool with bare hands?
Touching glass wool with bare hands is strongly discouraged. The material consists of fine glass fibers that can embed in the skin, causing significant irritation, redness, and itching. Industry-standard safety protocols mandate the use of personal protective equipment (PSA), inklusive Handschuhe, long-sleeved clothing, Augenschutz, and respiratory masks to prevent skin contact and inhalation of airborne fibers.
Does wool insulation need an air gap?
Whether glass wool requires an air gap depends on the application. For maximum thermal performance, the insulation should be friction-fit to completely fill the structural cavity (Z.B., between wall studs) without compression. This eliminates internal air gaps, which would encourage convection and reduce effectiveness. Jedoch, a ventilation air gap is often required on the cold side of the insulation assembly, such as in a vented attic or behind exterior cladding, to manage moisture and prevent condensation.
What temperature can glass wool withstand?
Standard glass wool insulation is non-combustible and can typically withstand continuous service temperatures up to approximately 232°C (450°F). Above this temperature, the binder that holds the glass fibers together may begin to deteriorate, though the glass fibers themselves melt at a much higher temperature (over 540°C or 1000°F). Specialized, high-temperature industrial glass wool products are available that can operate effectively at significantly higher temperatures.